 |
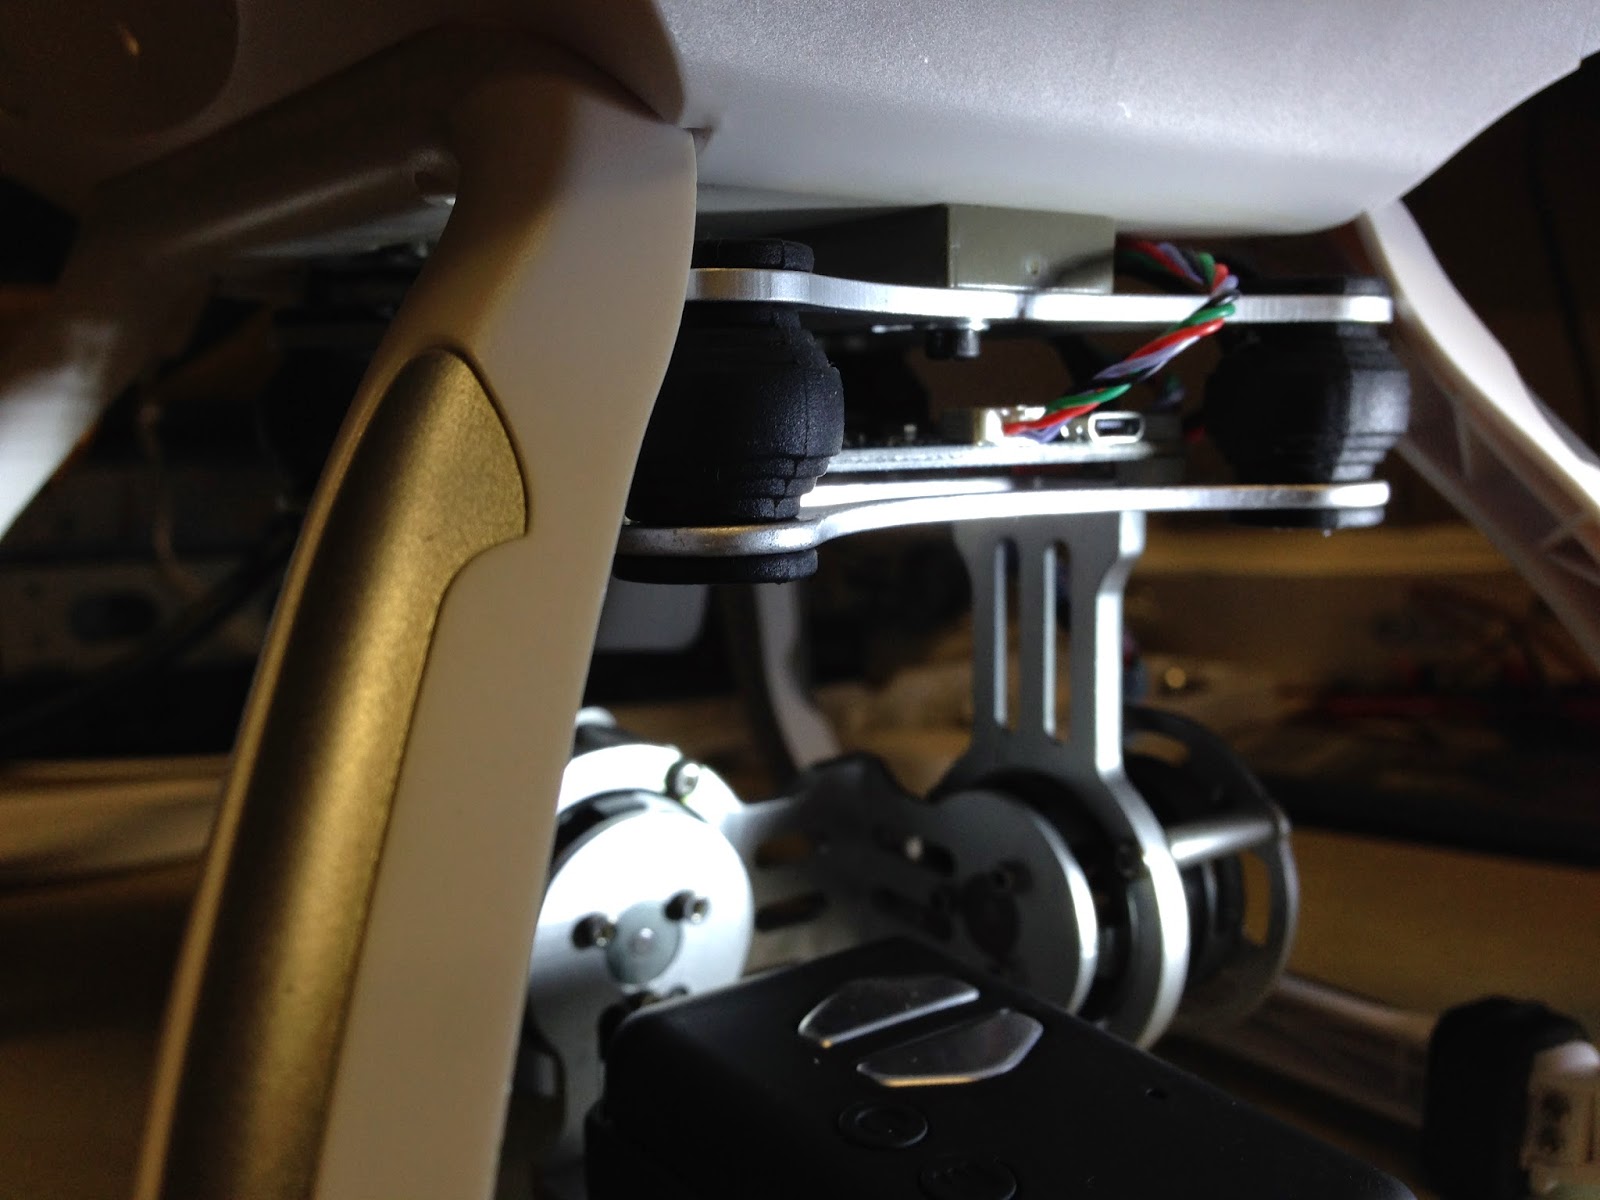
| Looks like a cloned 8bit BaseCam compatible controller |
 |
| Weighs 158 grams. Height is 95mm. |

I downloaded and installed the older 8-bit SimpleBGC v2.2-b2. This Windows program requires Java (runtime). It reports Board = 1.0 and Firmware = 2.2 b2. All seems to match close enough to prevent warnings. I just found this video, and while I didn't really use it, it does seem to cover the basics.
This appears to be a cloned-controller, so I think you are risking a bricking with flashing any other firmware (see forum reports). I'm not planning to do any firmware upgrades.
This version of SimpleBGC is fine and seems to work good. The "Silicon Labs CP210x USB to UART Bridge" driver loaded fine on this laptop. Mine connects with COM5. Its Cycle Time is counting and there are no I2C errors reported. Since it appears to have retrieved the current settings (from the controller) on start, I saved "Profile 1" as the shipping-defaults. Lots of settings here and I suggest you consult manual docs and not change anything that you are not familiar with.
This is what I ended-up with and seems to work "on bench". This video helped. Even swapped, his GoPro PIDs don't seem to work with Mobius (R=10,0.4,8 / P=6,0.4,6). The video's temporary Motor power to 0 tip works, and is how to find proper new axis and get gauges reporting properly. I kept re-calibrating (both AAC & GYRO) after each major change. Some changes (like Sensor Axis) seemed to require a controller reboot (power-reset). I got gauges working (as viewed from behind gimbal).
 |
| Motor power is lower due to less weight. Power and PIDs get swapped due to opposite form-factor of Mobius over GoPro (weight on different axis). Right Sensor is now Y. |
 |
| This is how you "swap Motor-Output wires" in software. You also want "High-Silent" here. |
 |
| Made Roll and Pitch more reasonable (to prevent mechanical binding with RC). I know mine can't Pitch to 90 degrees, but might be closer to 75 (will have to check later). |
It's a little confusing, so I welcome any comments if I got it wrong. From a standard GoPro install, there are 2 things that I see that are different (I also list required SimpleBGC changes due to each):
1. Gimbal is rotated 90-degrees, so axis shift.
- Motor Outputs (for Poll and Pitch) are swapped
- Sensor axis "Right" changed to "Y".
- When you get these right, notice gauges start reporting properly
- Motor Config Power percentages are swapped
- PID Controller values are swapped
- Lower Motor Power equally since Mobius is over-all lighter
Actual Installation
I'm installing in the default position (mostly under aircraft or toward CG) using both mounting screws. I thought this might help with balance since Mobius sticks-out in front. This "light version" is a bit different than original (heavier) metal version. Lower ports will be blocked with this gimbal (but no problem). I previously Dremel-ed some lower holes in Nova's plastic body, so I will use those to bring down power and signal wires.
I crafted a 6mm thick spacer of scrap plastic about 55mm long (6mm X 17mm X 55mm). This goes between the gimbal and body and provides a stable surface. I mounted the gimbal with two 2.5m-X-13mm metric screws. Make sure that screws don't protrude inside and scratch battery (use washers). Position so that landing gear is not touching gimbal frame (at least by 0.5-1mm)
Removed white power connector from gimbal and soldered on a female red JST socket connector. Since batteries come with red-JST males (plugs), seems like payload devices should have a female (sockets).
Soldered a male red JST plug connector to PowerBoard's 11.1v Lipo battery output. It turns-out that where a capacitor could have gone (but was apparently decided to not be needed) is "in parallel" to main battery. I used about 15cm of 22awg wire. Hard to tell, but wires go thru PCB-Vias (tiny holes) and slightly protrude on other side. I think this is more appropriate (than stock thin wire), and should be able to safely provide enough amps to all payloads under Nova.

This JST goes just outside lower quad to supply 12v to gimbal and whatever else.

The top-right 2 pins are gimbal controller pitch and roll. I ran my own 2 wire cable for signals only. To the inside and channels 9 & 10 on X8R-Tx (see next Blog post). Programmed Taranis Mixer to manually control them with S1-S2 pots.

With Mobius moved slightly forward, needs about 4-grams to balance. I put it here so I can use less weight. This is for 18mm space to connect Mini-USB (Down Angle plug) charger cable. Perfect balance without weight is a few mm back (but then, only a heavily-modified custom Mini-USB plug will fit in socket). Turns out, this standard Mini-USB cable will also fit Nova and Taranis.

You get all the details on my Blog, so in the "spirit of full disclosure" ... This is the only draw-back to this 90-degree swapped-axis mount. The camera down-pitch is slightly limited (due to frame). While the conventional install doesn't have this limitation, it has others including needing more weight to balance and no way to get lens this close to center (without turning camera upside-down I suppose). You would also need to use foam tape (or build a custom mount) if you want any kind of space behind camera for "always connected" FPV cables.

So I think this is the lesser of two-evils. I will work on fine-tuning programming on limits to prevent binding. The gimbal can always be changed (easily rotated back) later or I might even eventually upgrade to a new camera (likely a 1080p/60fps GoPro clone) and use the Mobius somewhere else.
Current PIDs and Mounting:
After some flights and testing, (and try other PIDs) I'm currently back to running the ones you see above. They are basically the Defaults that came on the controller. However, I've swapped them as required for axis swap. "Motor Config Power" was lowered about 10% each since Mobius is lighter than a GoPro) ... helps with "gimbal buzzing".
I've also modified the mounting slightly, but have decided not to publish those steps until they are proven by better quality videos.
Wow you swapped the pitch and roll cables to have the Mobius oriented this way? very good idea to mount this way!
ReplyDeleteGood info! I have the same gimbal and I center mount it. This allows me to access all the connections under the Cheerson CX-20. I then reversed the arm that holds both gimbals so the XiaoMi Yi clears the landing gear and props. You can see the results at https://www.youtube.com/watch?v=skj8fJkMZBw. The quad is off center weight wise, but FPV transmitter and GPS tracker mounted rearward should balance it out nicely in the future. The video is not the best - it was a quick and dirty test, I have gotten better at tuning the gimble since that video.
ReplyDelete
DeleteThanks for posting video link. I hope to maiden my gimbal this weekend (weather and schedule allowing). Excellent gimbal hack. Looks like you figured-out SimpleBGC pretty good. If you want, drop by CX-20/Nova Advanced thread on RCGroups and post some pics of your gimbal mod.
http://www.rcgroups.com/forums/showthread.php?t=2261997 ... I would love to see it. I'm loving this gimbal ... it's very easy to reconfig.
Yes, the XiaoMi Yi is on my short list for next camera (so again, thanks for video).
Hi there,
ReplyDeleteCan you provide more pics on the setup, because of the covered ports?
Thank you.
*notification
DeleteLike what exactly?
DeleteAfter the summer i'm sure you reached a very nice steeing on your machine ;) Thanks for publish it was helpful to me.Keep up the good work
ReplyDelete